
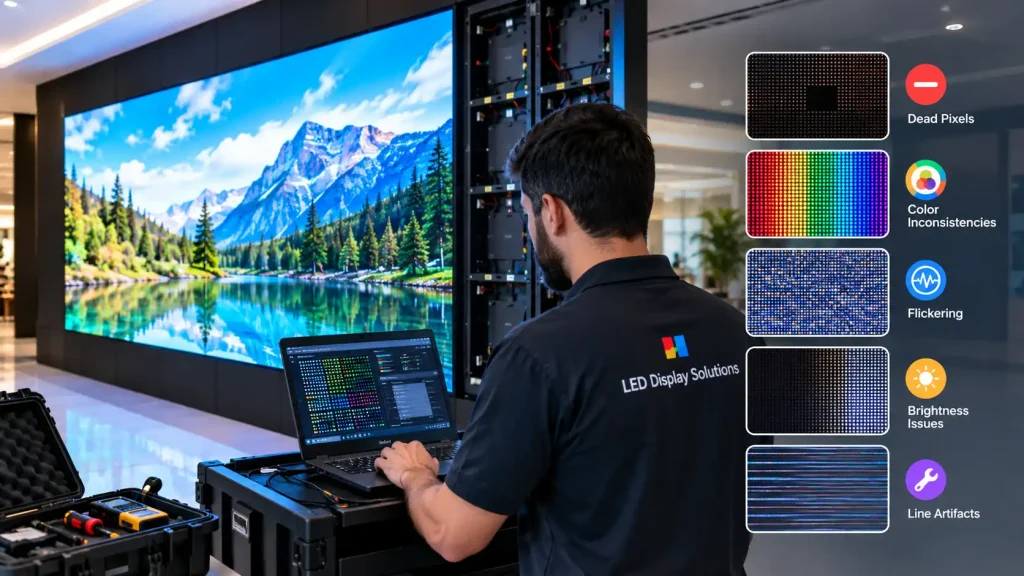
A black rectangle in the middle of your screen looks like a disaster. Most of the time, it is a loose cable or one failed power supply, and it takes 20 minutes to fix.
The trick is knowing where to look. LED screens pass power and data along a chain, and every fault has a pattern that points to its cause. Learn to read the pattern and you can tell your technician exactly what to bring, or fix the simple ones yourself.
Safety first: LED screens run on 220 V AC. Switch off the main supply before opening any cabinet. Leave internal power supply work to trained technicians.
How an LED Screen Works, in One Chain
Understanding the signal path makes diagnosis logical.
- Power: Mains supply → breaker → stabiliser → power supplies (PSUs) in each cabinet → modules
- Data: Source (PC or media player) → sending card or controller → network cables → receiving card in each cabinet → ribbon (HUB) cables → modules
The golden rule: a data fault appears at the first failed component and affects everything after it in the chain. A power fault affects only what that power supply feeds.
Your controller and its software determine how much you can monitor remotely. See how to choose the right control system for a comparison of common options.
Fault Diagnosis Table: 15 Common Symptoms
| # | Symptom | Most Likely Cause | First Check | Who Fixes It |
| 1 | Whole screen black | No mains power, source off, sending card or HDMI/DVI cable fault | Breaker, source output, cable, controller lights | Owner, then technician |
| 2 | Whole screen shows wrong or frozen image | Media player or PC crash, wrong input | Restart source, check input selection | Owner |
| 3 | One cabinet completely black | Receiving card fault or network cable between cabinets | Swap network cable, check receiving card LEDs | Technician |
| 4 | Every cabinet after one point is black | Network cable or receiving card at the break point | Find the first dark cabinet in the chain | Technician |
| 5 | Half or part of a cabinet dark | One PSU failed | Check PSU indicator light and output voltage | Technician |
| 6 | One module black | Module power cable, ribbon cable or module failure | Reseat cables, swap with a spare module | Owner with spare, or technician |
| 7 | Row of modules showing garbled image | Faulty ribbon cable or module passing bad data down the line | Check the first module where the error starts | Technician |
| 8 | Module missing one colour (no red, for example) | Ribbon cable pin or driver IC fault | Swap ribbon cable, then module | Technician |
| 9 | Scattered dead pixels or black spots | Failed LEDs, moisture, electrostatic damage | Inspect for water marks, count spots | Technician, module repair |
| 10 | Column of pixels stuck on or trailing (“caterpillar”) | Short circuit in LED or driver IC | Identify module, replace | Technician |
| 11 | New module looks brighter or a different colour | Calibration data not matched to new module | Reload calibration coefficients | Technician |
| 12 | Whole screen flickers | Low refresh rate, unstable power, poor earthing, loose data | Check voltage, earthing, cable seating | Technician |
| 13 | Mosaic or scrambled image across screen | Wrong configuration file loaded to receiving cards | Reload correct config via software | Technician |
| 14 | Screen dims on its own | Light sensor, brightness schedule or over-heat protection | Check schedule settings and cabinet temperature | Owner, then technician |
| 15 | Half-lit or foggy pixels after rain | Water ingress | Switch off, dry cabinet, check seals | Technician urgently |
Step-by-Step Diagnosis Method
Step 1: Check the Source
Connect a laptop directly to the controller. If the image appears, the original source was the problem. If not, move to the controller.
Step 2: Check the Controller or Sending Card
Look at its indicator lights. Most controllers show power and signal status. A frozen or dark status light points to the controller or its input cable.
Step 3: Trace the Chain
Walk the screen from the first cabinet in the data chain. The first cabinet or module showing a fault is where you start. Everything after it is often fine and just not receiving data.
Step 4: Swap, Don’t Guess
The fastest diagnostic tool is a known-good spare. Swap a module, a receiving card or a ribbon cable. If the fault moves with the part, the part is faulty. If it stays, the problem is upstream. Our SMD screen modules guide explains how modules connect and how to replace one safely.
Step 5: Check Power Last, but Measure It
Use a multimeter on the PSU output. LED modules typically run on around 4.5 to 5 V DC. A reading well below that means a failing supply.
Faults Caused by Pakistani Conditions
Not every fault is random. Many follow the season and the grid.
| Local Cause | Typical Fault | Prevention |
| Voltage swings and generator changeover | Burnt PSUs, reset receiving cards | Stabiliser, surge protection, UPS for control |
| Summer heat above 45°C | PSU failure, dimming from thermal protection | Clean fans, clear airflow, brightness control |
| Dust storms | Clogged fans, overheating | Quarterly filter cleaning |
| Monsoon rain | Black spots, corrosion, dead modules | Sealed glands, drainage, post-rain checks |
| Coastal humidity in Karachi | Corroded connectors, intermittent faults | Coated connectors, aluminium cabinets |
| Rodents and birds | Chewed cables, blocked vents | Sealed cable entries, mesh guards |
For weather-related faults, our guides on IP65 vs IP68 waterproofing and weatherproofing your SMD screen for Lahore’s monsoon and heat show how to stop them before they start. Power-related failures often trace back to undersized supply, covered in our SMD screen power consumption guide.
Image Quality Faults That Are Not Hardware Failures
Some complaints are not faults at all. They are settings or specification limits.
Uneven Colour Across the Screen
Modules age at different rates. Over time, patches appear. Dot correction, or pixel-level calibration, measures each LED and evens them out. Learn more in what dot correction is.
Flicker or Lines on Camera
If the screen looks fine to the eye but shows lines on phones and cameras, the refresh rate is too low for filming. See our SMD screen refresh rate explainer.
Banding in Dark Scenes
Visible steps in gradients, especially at low brightness, point to limited grayscale processing. Read the science of grayscale in SMD LED screens.
Faults That Start at Installation
Many “faults” in the first six months trace back to installation: poorly crimped power cables, unsealed cable entries, no earthing, and cabinets packed too tight for airflow. Our list of SMD screen installation mistakes shows what to check on handover day.
Spare Parts Strategy: Cut Downtime From Days to Minutes
| Spare Part | Recommended Quantity | Why |
| LED modules | 2 to 3% of total, same batch | Colour match with existing modules |
| Power supplies | 1 to 2 per 20 cabinets | Most common failure in heat |
| Receiving cards | 1 to 2 per screen | Fast swap for black cabinets |
| Ribbon and power cables | A small set | Cheap, frequent cause of faults |
| Network cables | 2 to 3 | Quick chain repair |
Order spares with the screen. Modules bought a year later often come from a different batch and never match perfectly.
Preventive Maintenance Beats Repair
A monthly visual check and a quarterly technical inspection prevent most of the faults above. Follow our step-by-step guide to maintaining your SMD screen, and for high-use advertising screens, our checklist for maintaining your commercial SMD screen.
When to Call a Technician Immediately
- Burning smell or visible smoke
- Water visible inside a cabinet
- Sparking at cables or PSUs
- Repeated tripping of the breaker
- Faults spreading across multiple cabinets
Local Support Matters
A fault fixed in two hours costs little. A fault that waits a week for parts from abroad costs airtime and reputation. That is one reason many buyers weigh importing SMD screens vs buying locally in Pakistan before they buy.
SMDLED supports installations across Pakistan, including south Punjab through our SMD screen provider in Bahawalpur page. Common owner questions are answered on our FAQs page.
Screen showing a fault you cannot trace? Send a photo or short video of the problem through our contact page. Our technicians can often identify the cause from the pattern alone and bring the right part on the first visit.
Frequently Asked Questions
Why is one section of my LED screen black?
Usually a failed power supply or receiving card for that section, or a loose network or power cable.
Why does my LED screen flicker?
Common causes are unstable power, poor earthing, loose data cables or a low refresh rate.
Can I replace an LED module myself?
Yes, with a matching spare and the power switched off. Front-service modules release with a magnetic tool. Calibration data may need reloading after the swap.
How long should LED screen repairs take?
With spares on site, most module, PSU and receiving card faults can be fixed within hours.